Launch & Usage
Establish a serial connection between target flight controller and your OSCP IMU Products, then verify it in Mission Planner on either Linux or Windows.
Find the Serial Port
Important
Ensure your adapter (InertialGate, MicroGate, or custom) is properly connected to both the flight controller and the OSCP IMU.
- Connect the flight controller via USB.
- Open a terminal.
-
List available serial devices:
ls /dev/ttyUSB* ls /dev/ttyACM* -
Look for a device such as:
/dev/ttyUSBX -
Note the device path such as
/dev/ttyUSB0or/dev/ttyACM0.Note
This serial device is required in Mission Planner.
Important
Ensure your adapter (InertialGate, MicroGate, or custom) is properly connected to both the flight controller and the OSCP IMU.
- Connect the flight controller via USB.
- Open Device Manager.
-
Expand Ports (COM & LPT).
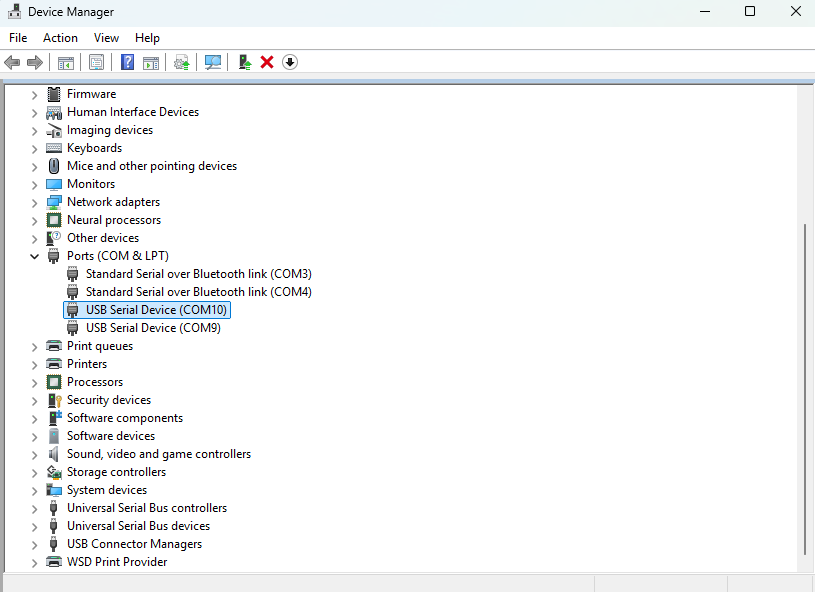
-
Look for a device such as:
USB Serial Device (COMx) -
Note the COM number such as
COM3orCOM7.Note
This COM number is required in Mission Planner.
Connect in Mission Planner
- Launch Mission Planner.
- Select the correct communication port from the dropdown menu (e.g.,
/dev/ttyUSB0on Linux orCOM10on Windows). - Configure the baud rate to match the flight controller's interface requirements.
-
Click Connect to initialize the serial communication link.

-
Wait for the flight controller to initialize and connect.
Next Steps
If the connection is successful, Mission Planner should communicate with the flight controller without issue. To enable OSCP IMU functionality, continue to Setup & Config for parameter configuration and final setup.